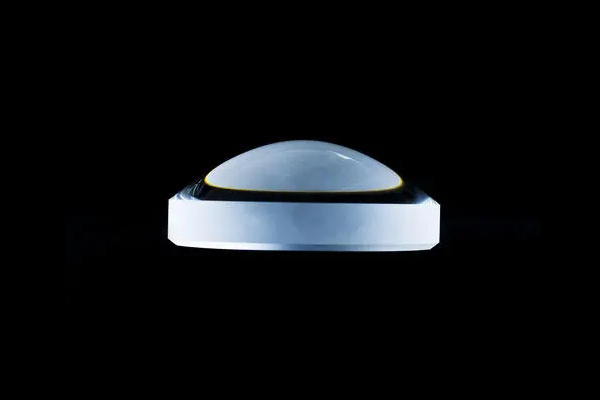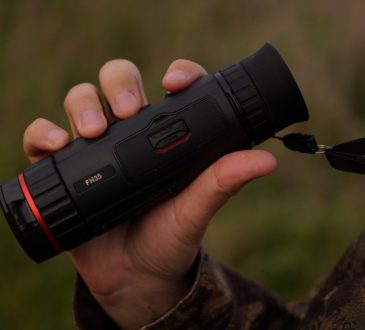
The demand for high-performance optical systems has grown significantly in the aerospace, medical devices, automotive, and consumer electronics industries. Aspheric optics play a vital role in these applications by eliminating spherical aberrations and providing better focus and sharper images. Unlike traditional spherical lenses, aspheric lenses have complex, non-spherical surfaces, requiring precise measurement tools and techniques for quality assurance.
In recent years, advancements in metrology have transformed the production of aspherical optics, ensuring these lenses meet stringent performance standards. This article explores key metrology methods used for aspheric lenses, the challenges involved, and the latest innovations that drive precision manufacturing.
The Importance of Metrology in Aspheric Lens Production
Manufacturing aspheric lenses involves advanced processes such as grinding, CNC polishing, molding, and coating. However, the unique shape of these lenses introduces complexities in measurement and inspection. Even minor deviations from the intended curvature can lead to performance issues in the final product, such as image distortion or light scattering. Metrology ensures that the lens geometry aligns with design specifications, enabling manufacturers to achieve high precision and repeatability in production.
Quality control for aspheric lenses goes beyond standard dimensional measurements; it also requires detailed surface analysis to detect flaws like micro-cracks, scratches, and uneven coatings. Metrology tools and techniques help maintain consistency, reduce waste, and ensure that lenses meet the optical performance criteria required for their intended application.
Key Metrology Techniques for Aspheric Lenses
Several advanced techniques are used to measure aspheric lenses, each providing different levels of precision and insights into lens geometry and surface quality:
Interferometry
Interferometry is one of the most widely used techniques for high-precision measurements of aspheric lenses. This method uses the interference pattern of light waves to measure surface deviations with sub-micrometer accuracy. Interferometers can detect even the smallest imperfections in the lens geometry by comparing the lens surface to a reference wavefront. Interferometry is especially valuable for large-scale production, where non-contact measurements minimize the risk of damaging delicate optics.

Profilometry
Profilometry offers an effective alternative for lenses with steep slopes or complex geometries that interfere with interferometric measurements. A stylus or optical probe scans the lens surface to create a 3D profile in this method. Both contact and non-contact profilometers are available, with non-contact versions preferred for fragile or coated lenses. Profilometry provides detailed surface roughness measurements, ensuring that CNC-polished aspheres meet the required smoothness and accuracy.
Coordinate Measuring Machines (CMM)
CMMs are highly versatile tools that use tactile or optical probes to measure the 3D coordinates of an object’s surface. They are ideal for evaluating larger optics or lenses with complex designs. In aspheric lens production, CMMs provide valuable insights into geometric dimensions, helping manufacturers confirm that the lens shape conforms to specifications. CMMs are often combined with other metrology tools to ensure comprehensive quality assurance.
Optical Surface Testers and Shack-Hartmann Sensors
Specialized optical surface testers and Shack-Hartmann sensors are used to measure the wavefront quality of aspheric lenses. These tools provide real-time feedback on the lens’s ability to transmit or focus light accurately, which is critical for applications such as medical imaging and high-resolution cameras.
Challenges in Measuring Aspheric Lenses
Although advanced metrology tools have improved the measurement of aspheric lenses, certain challenges remain. The non-spherical shape of these lenses makes it difficult to use traditional inspection techniques. For instance, high slopes and complex curvatures can introduce distortions in interferometric measurements, requiring custom setups or reference optics. Additionally, coatings applied to lenses can impact the accuracy of non-contact measurements, necessitating specialized sensors or recalibrations.
Another challenge lies in the production environment. Manufacturing facilities often operate under tight deadlines, with large batches requiring quick and accurate measurements. As a result, metrology tools must offer both precision and speed to meet production demands. Real-time data feedback is increasingly essential to reduce downtime and avoid costly rework.
Innovations in Metrology for Aspheric Lenses
To address these challenges, recent innovations in metrology are enhancing the precision and efficiency of aspheric lens production.
Automated Metrology Systems
Automation transforms how aspheric lenses are measured, allowing manufacturers to integrate metrology directly into the production line. Automated systems equipped with robotic arms and sensors can inspect lenses without manual intervention, significantly speeding up the process and improving accuracy.
Machine Learning and Data Analytics
Machine learning algorithms are applied to analyze metrology data and predict potential defects. By identifying patterns in measurement results, these systems can alert operators to deviations before they lead to product failures. Predictive maintenance enabled by data analytics also minimizes downtime and improves production efficiency.
Non-Destructive Testing (NDT)
Advanced non-destructive testing methods are becoming more popular for coated or fragile lenses. These techniques allow manufacturers to inspect lenses without the risk of damage, ensuring that high-value optics maintain their integrity throughout the production process.
The Future of Aspheric Lens Metrology
As the demand for high-performance optics grows, metrology will be increasingly important in ensuring product quality and innovation. Emerging technologies such as holographic metrology and adaptive optics testing will likely enhance the precision of aspheric lens measurements.
Additionally, integrating digital twins—a virtual replica of the physical product—can help manufacturers simulate and optimize production processes before lenses are physically produced. With ongoing advancements in metrology, the production of aspherical optics will continue to become more efficient, accurate, and cost-effective.
Conclusion
The precision measurement of aspheric lenses is essential for industries that rely on high-quality optical components. While challenges exist, innovations in automated systems, machine learning, and non-destructive testing are driving improvements in the metrology process. With the right combination of tools and expertise, manufacturers can achieve the precision required for CNC-polished aspheres and other advanced optics. As metrology technologies evolve, they will further enhance the quality and performance of aspheric optics, opening new possibilities in optical design and application.


